Hocus Pocus: Craft

For some reason, Hocus Pocus is bigger now than it has ever been. Being one of a few Disney Halloween movies, I think that it will always have a strong cult following. The kids watched it for the first time this year and loved it. Recently, I saw some paper mache' witches hats at Michael's and thought it would be fun to do a Hocus Pocus themed display on our mantle.
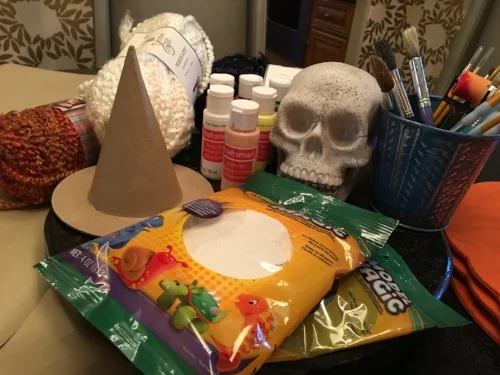
It is all about the supplies. The skull was just there for moral support.
What it takes...
- (3) Kraft Witches Hats
- Acrylic Paints
- Model Magic
- Yarn for the hair
- Hot Glue Sticks
- Jump Rings for Mary's Dress
- Pencils, Scissors, Scissors
The inspiration: Mary, Winifred and Sarah Sanderson.
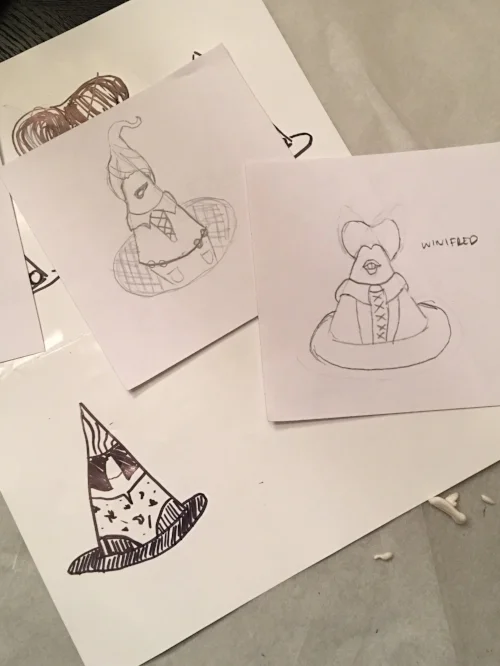
Rough sketch of our plans for the hats
We started out by drawing what we wanted to do with the hats on paper. Once we got something that we liked, we transferred the designs onto the hats with pencil.
Next, we started painting. There was a lot of trial and error when mixing the colors but we finally got what we wanted. The hats were really absorbent so we had to do multiple layers of the paint in most places.
Adding the first layer of paint
The hair was a lot of fun to make. For Mary and Winifred we used Model Magic to get the shape we wanted. We put it on the top of the hats to get the right contouring. After that we removed the clay and let it dry overnight. We used black for Mary and white for Winifred. After it was dry, we painted over the whit with orange. The yarn that we used was perfect for all three. And we have a ton of it leftover so let us know if you need to borrow some. We used hot glue to apply the yarn to the clay. We kept referring to the inspiration photo to see how it should lay down. Mary's was looser and less tamed. Winifred's was tighter and we coiled it as we worked around the clay. It was very easy to do.
Sarah's was also very easy. We cut about 15 strands of hair and then tied it together in the center with a small knot. We then attached the "wig" to the top of the hat with a small drop of hot glue.
Adding a few more details
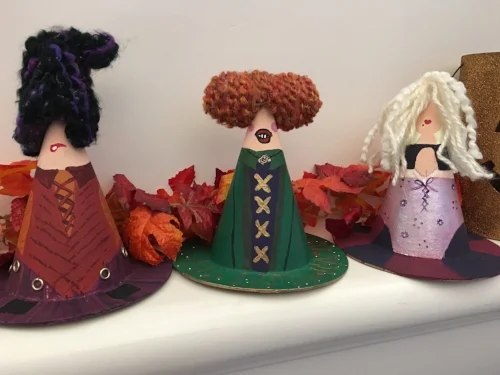
We added more details to each of their outfits. The costumes were really fun to study. Kudos to the wardrobe department that designed them!
The final result
We decided that we love these so much that we will store them to bring out every Halloween. They remind me of the clothespin Christmas ornaments that my Grandma Mary used to make every year. Sadly, she passed away but our absolute favorite part of decorating the tree is when we pull out her magical creations. The kids never got to meet her or experience what an incredible woman she was. But they love hearing my stories about her and learning about all of her crafts and baking.
Happy Halloween! We hope these hats inspire you to craft some of your own memories.


